C2b: Introduction to Essential Lab Instrumentation
Welcome to the world of biological investigation! To explore this world, you’ll need reliable tools. This pre-lab reading introduces you to some of the fundamental instruments you’ll encounter in the General Biology Lab. Understanding their purpose, basic operation, and proper care is crucial for accurate experimental results and a safe lab environment.
General Rules for Using Lab Instruments:
- Read Instructions: If available, familiarize yourself with the instrument’s specific operating manual or instructions provided by your TA.
- Ask if Unsure: Never hesitate to ask your lab instructor or TA if you are uncertain about how to use any piece of equipment. It’s better to ask than to cause damage or get incorrect results.
- Report Malfunctions: If an instrument seems to be working incorrectly or is damaged, report it to your instructor immediately. Do not attempt to fix it yourself.
- Handle with Care: Treat all lab instruments with respect. They are often sensitive and expensive.
- Clean Up: Leave instruments clean and in good condition for the next user.
1. Measuring Mass: Balances
Balances are used to accurately determine the mass of a substance. In a typical biology lab, you might encounter two main types:
- Top-Loading Balance: Used for quickly measuring mass with good precision (e.g., to 0.1g or 0.01g). Suitable for larger quantities and when extremely high precision isn’t paramount.
- Analytical Balance: Used for highly precise mass measurements (e.g., to 0.001g or 0.0001g). They usually have a draft shield (enclosed chamber) to prevent air currents from affecting the measurement.
 Figure 1: Different types of balances.

Key Parts:
- Pan: Where you place the substance to be weighed.
- Display: Shows the mass reading.
- Tare/Zero Button: Resets the display to zero. Essential for excluding the mass of a container.
- Draft Shield (Analytical Balances): Glass doors to minimize air current effects.
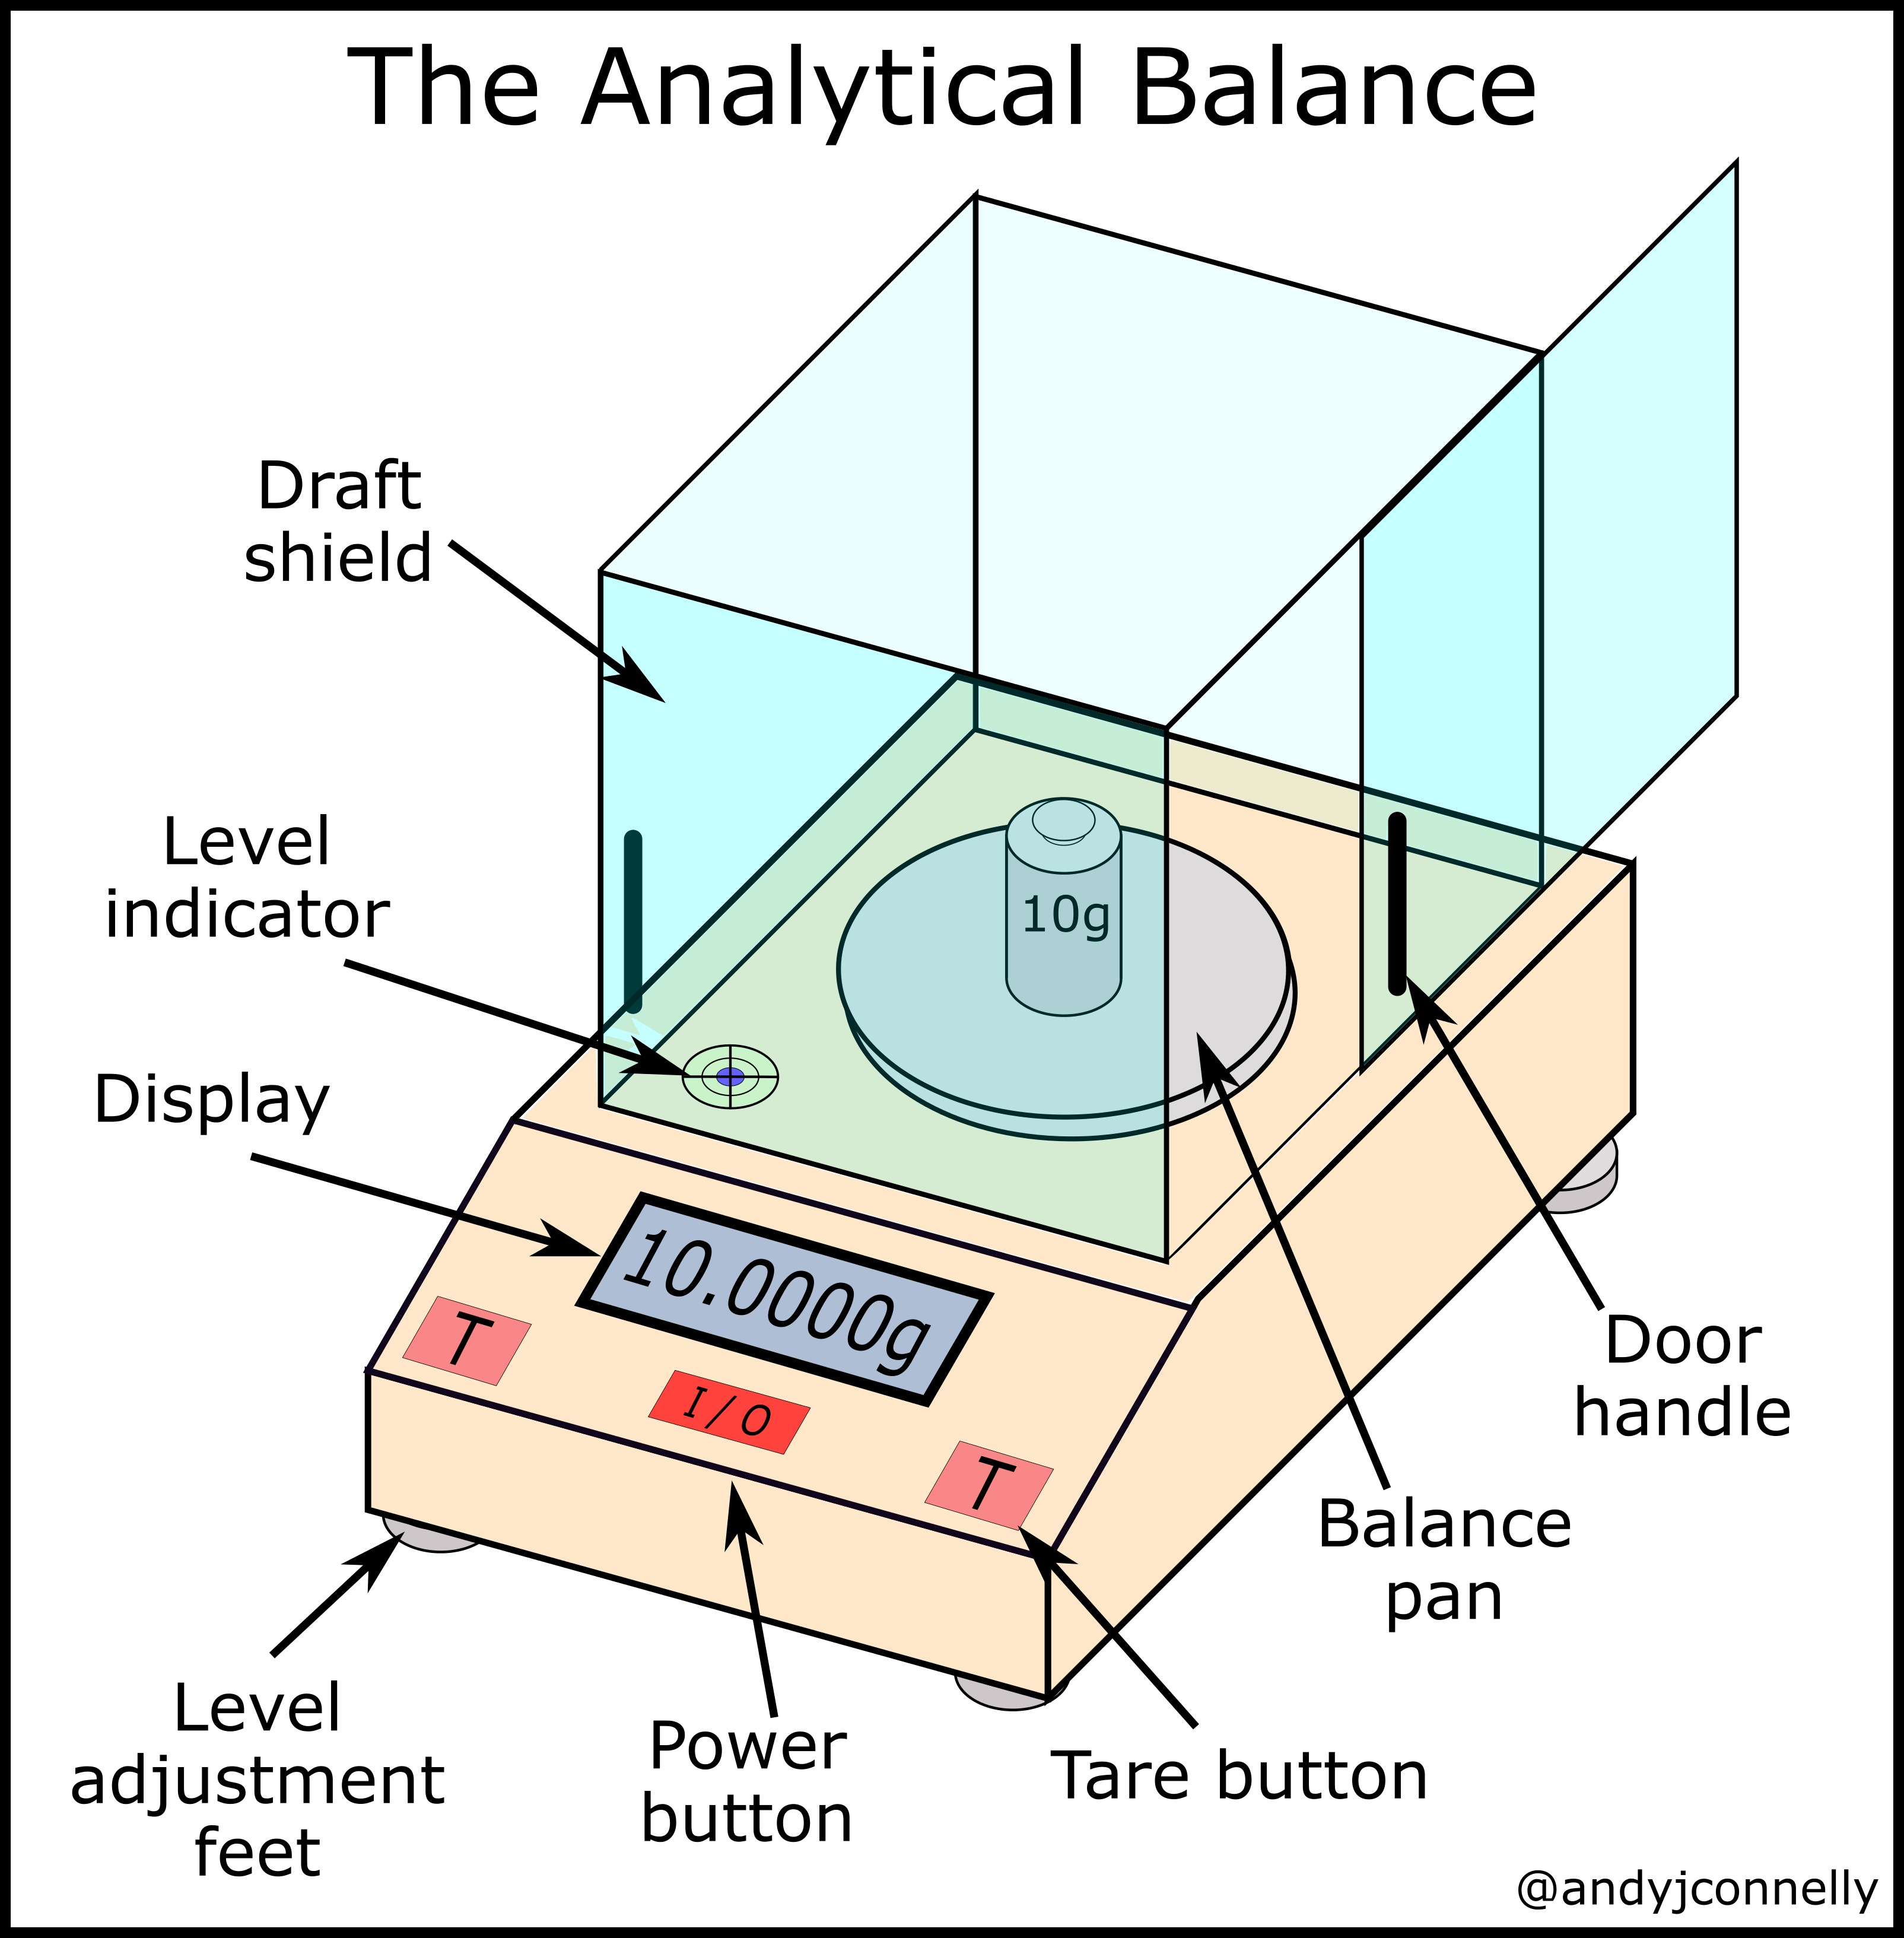 Figure 3: Key Parts of Analytical Balance.
Using a Balance (General Steps):
- Check & Level: Ensure the balance is clean and level (many have a bubble level).
- Turn On: Power on the balance and allow it to stabilize.
- Container: Place a weighing paper, weighing boat, or empty container on the center of the pan.
- Tare: Press the “Tare” or “Zero” button. The display should read 0.00g (or similar). This subtracts the container’s mass.
- Add Substance: Carefully add the substance to the container. Avoid spilling on the pan. For analytical balances, close the draft shield doors.
- Record Mass: Wait for the reading to stabilize, then record the mass.
- Clean: Remove the container. Carefully clean up any spills on or around the balance using a brush.
Watch this video for a demonstration of Analytical Balance:
Tips for Accurate Weighing:
- Never place chemicals directly on the balance pan.
- Ensure the balance is on a stable, vibration-free surface.
- For analytical balances, keep the draft shield doors closed while measuring.
- Allow hot or cold objects to return to room temperature before weighing, as temperature differences can create air currents.
2. Measuring Liquid Volumes
Accurately measuring liquid volumes is fundamental in biology labs. You’ll use various tools for this.
2.1 Micropipettes (Piston-Operated Pipettes)
Micropipettes are designed to accurately measure and transfer very small volumes of liquid, typically in the microliter (µL) range. 1000 µL = 1 mL.
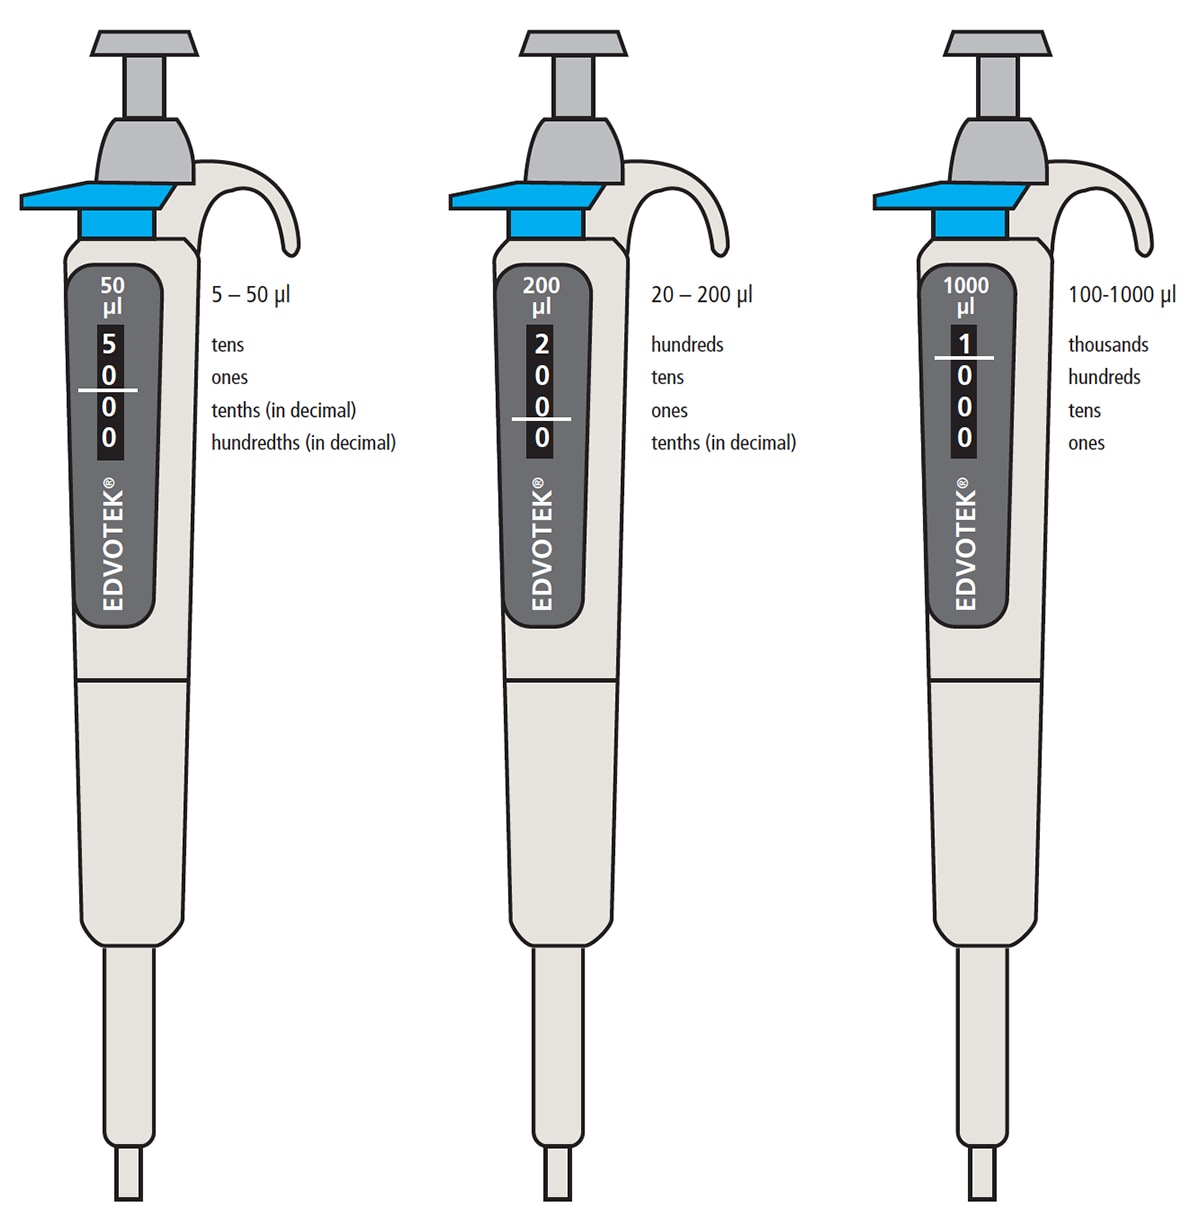 Figure 4: A set of micropipettes, each for a different volume range.
Common Types & Ranges:
- P10: Measures 0.5-10 µL
- P20: Measures 2-20 µL
- P100: Measures 10-100 µL
- P200: Measures 20-200 µL
- P1000: Measures 100-1000 µL (or 200-1000 µL)
Always use a micropipette within its specified volume range.
Key Parts:
- Plunger Button: Has two “stops.” Used for aspirating and dispensing liquid.
- Volume Adjustment Knob: Used to set the desired volume. The volume is displayed in a window.
- Tip Ejector Button: Used to remove the disposable tip.
- Shaft/Barrel: Where the disposable tip is attached.
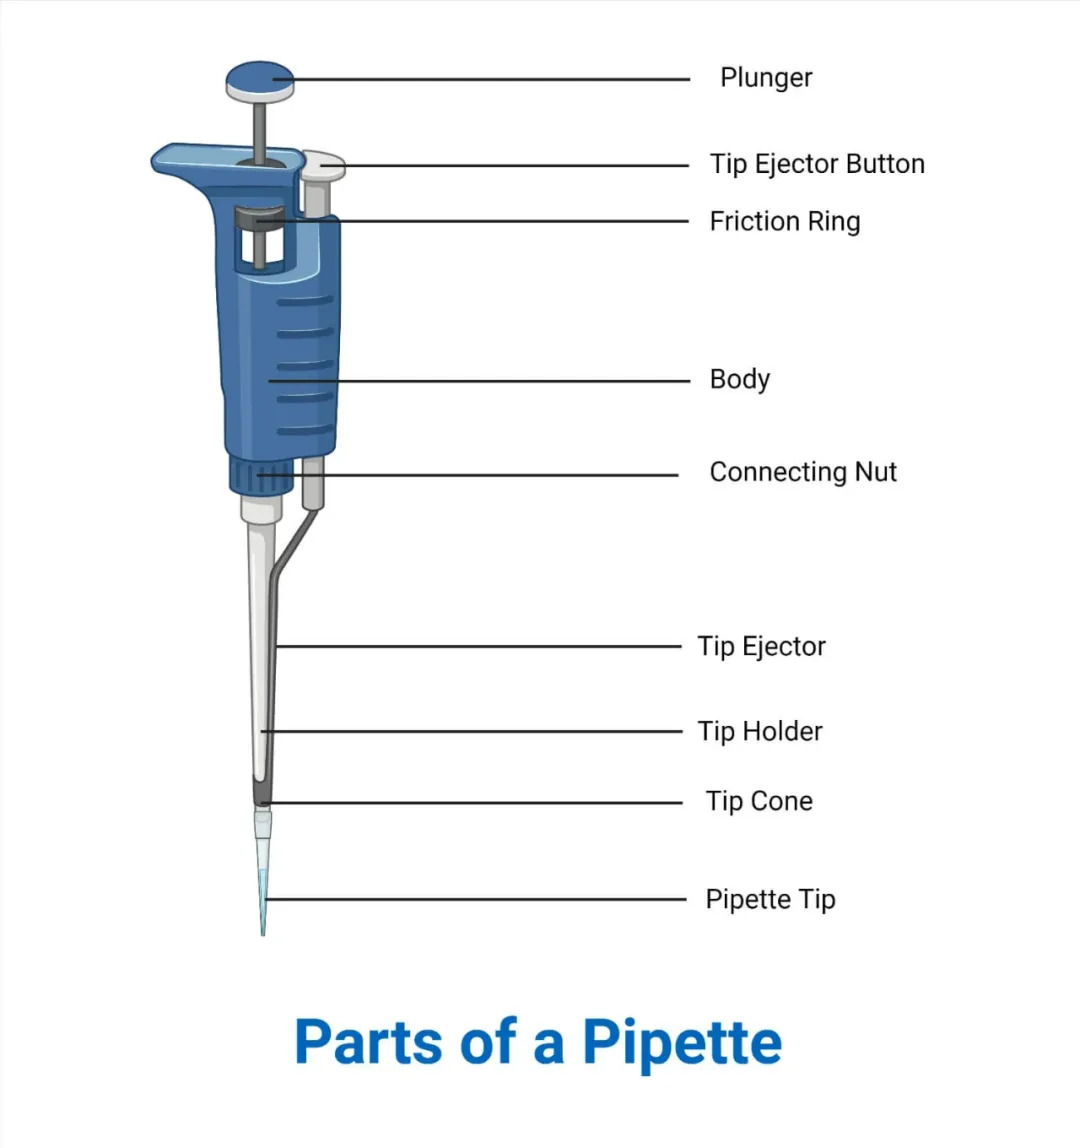 Figure 5: Key parts of a Micropipette.
How to Use a Micropipette (Forward Pipetting):
- Select Correct Pipette: Choose the pipette whose range includes your desired volume. For accuracy, select the smallest pipette that can handle the volume.
- Set Volume: Turn the volume adjustment knob to set the desired volume. Ensure the digits are aligned correctly in the display window. Never try to set a volume outside the pipette’s range.
- Attach Tip: Firmly press a new, sterile disposable tip onto the pipette shaft to ensure an airtight seal.
- Aspirate Liquid:
- Depress the plunger smoothly to the FIRST STOP.
- Immerse the tip just below the surface of the liquid (2-3 mm).
- Slowly and smoothly release the plunger to draw liquid into the tip. Keep the tip submerged. Wait a second to ensure the full volume is drawn up.
- Dispense Liquid:
- Touch the pipette tip to the inside wall of the receiving vessel at an angle.
- Smoothly depress the plunger to the FIRST STOP. Pause.
- Then, depress the plunger to the SECOND STOP (blow-out) to expel any remaining liquid.
- With the plunger still fully depressed, slowly withdraw the tip from the vessel, sliding it up the wall.
- Release the plunger.
- Eject Tip: Eject the used tip into an appropriate waste container by pressing the tip ejector button.
 Figure 6: Read and set Micropipette volume.
Watch this video for a demonstration of micropipette volume setting:
Watch this video for a demonstration of micropipette technique:
Care & Precautions:
- Always use a new tip for each different liquid to avoid contamination.
- Never lay a micropipette down with liquid in its tip (liquid can run into the piston).
- Never turn the volume adjustment knob beyond the pipette’s stated range.
- Store micropipettes upright on a stand when not in use.
- If pipetting viscous liquids or organic solvents, consult your instructor for special techniques (e.g., reverse pipetting).
2.2 Graduated Glassware
- Graduated Cylinders: Used for measuring liquid volumes with reasonable accuracy (more accurate than beakers/flasks, less than pipettes).
- Reading the Meniscus: For clear liquids, read the volume at the bottom of the curved surface of the liquid (the meniscus) while holding the cylinder at eye level.
- Beakers and Erlenmeyer Flasks: Primarily used for mixing, stirring, heating solutions, and for approximate volume measurements. The volume markings on beakers and flasks are not highly accurate.
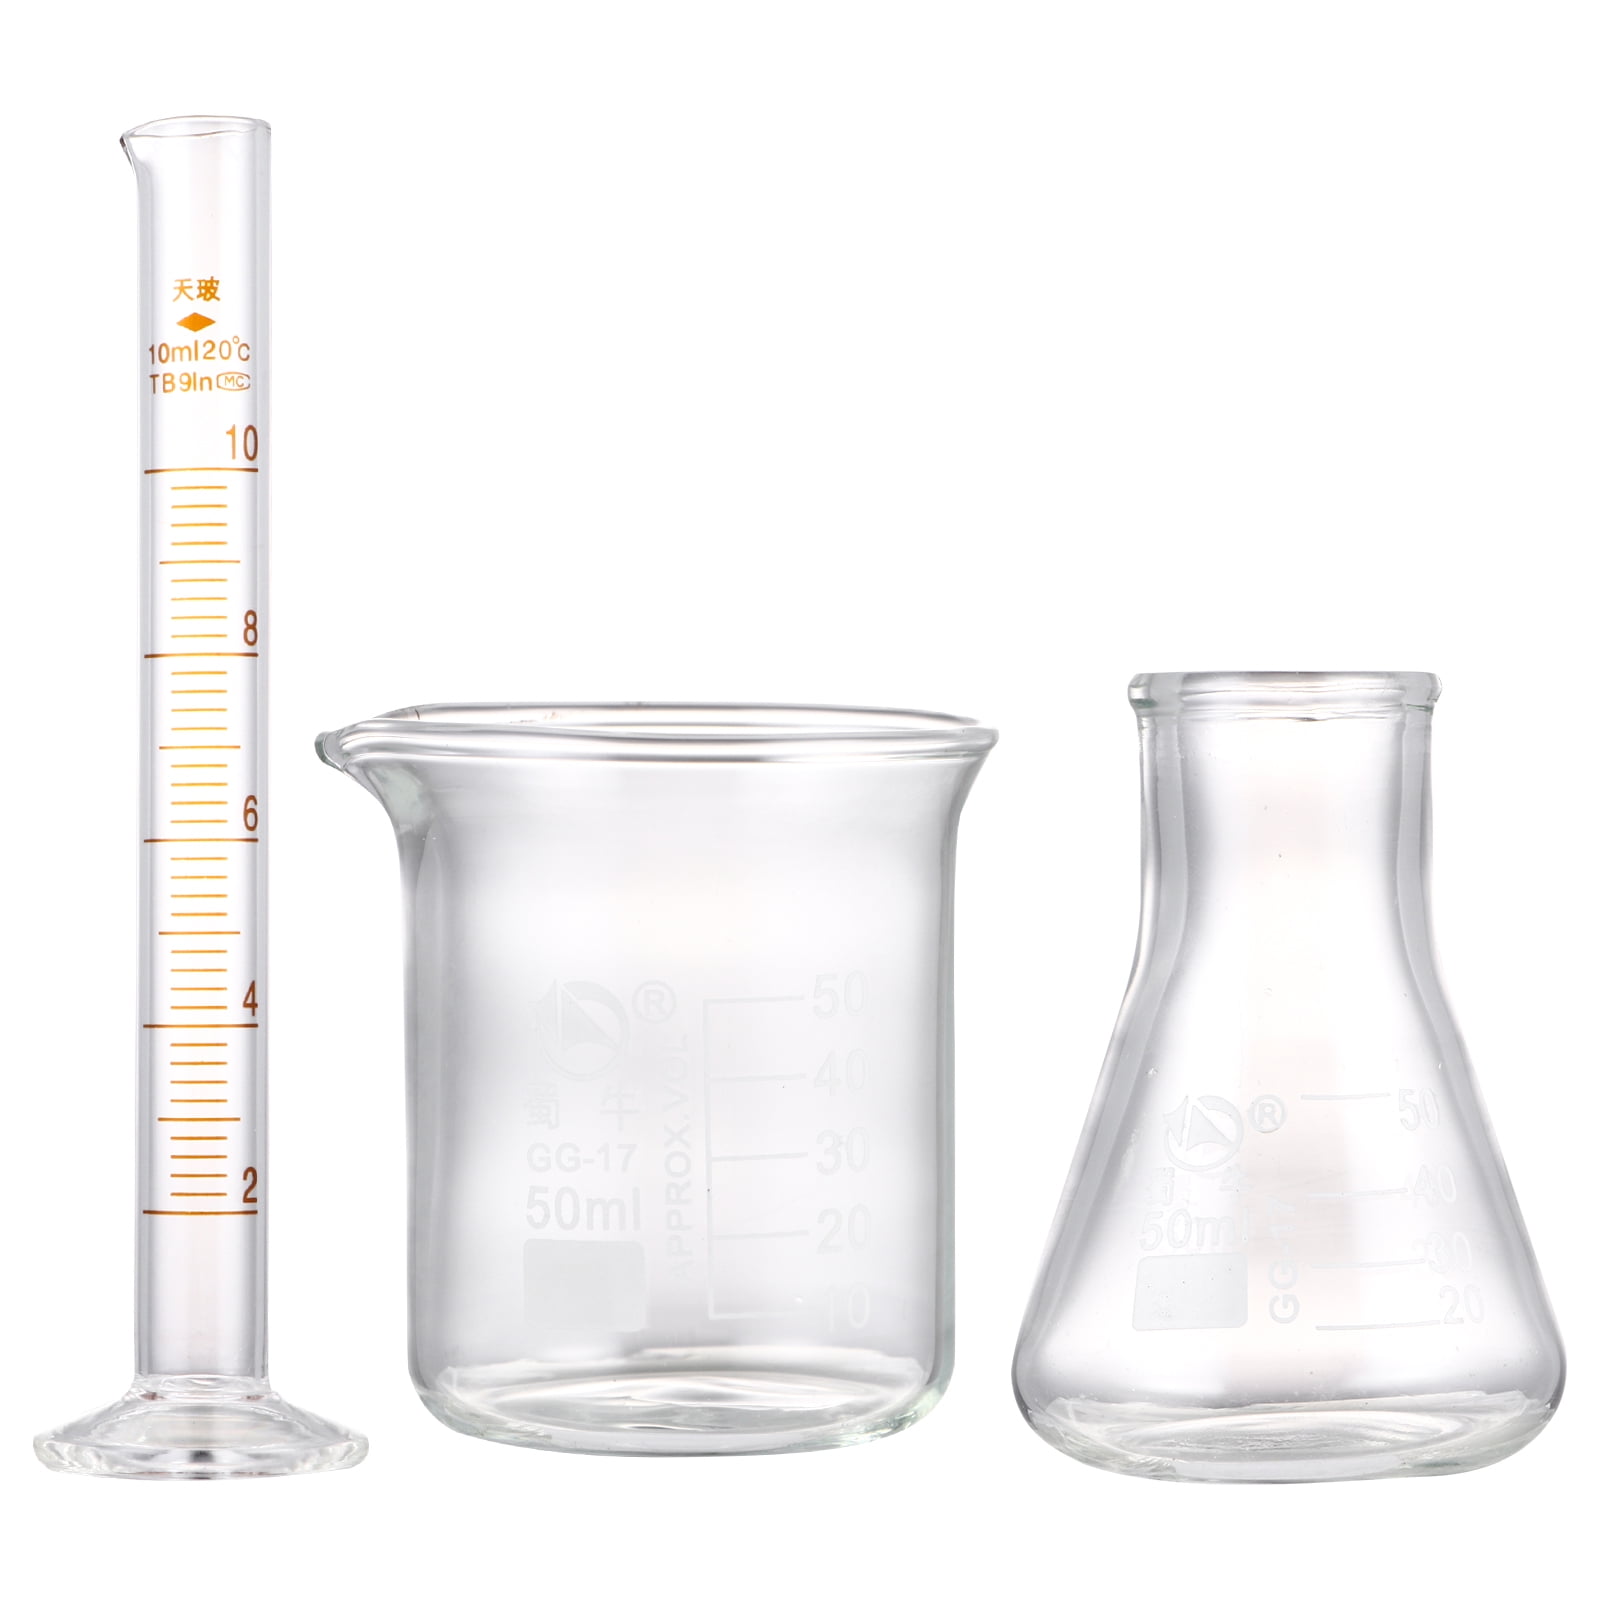 Figure 7: Graduated cylinder (left), beaker (center), Erlenmeyer flask (right).
3. Separating Samples: Centrifuges
Centrifuges use high-speed rotation to create centrifugal force, separating substances in a mixture based on their density. Denser components move to the bottom (forming a “pellet”), while less dense components remain above in the “supernatant.”
Types:
- Microcentrifuge (or “Microfuge”): For small sample tubes (e.g., 1.5 mL or 2.0 mL Eppendorf tubes).
- Benchtop/Clinical Centrifuge: For larger tubes.
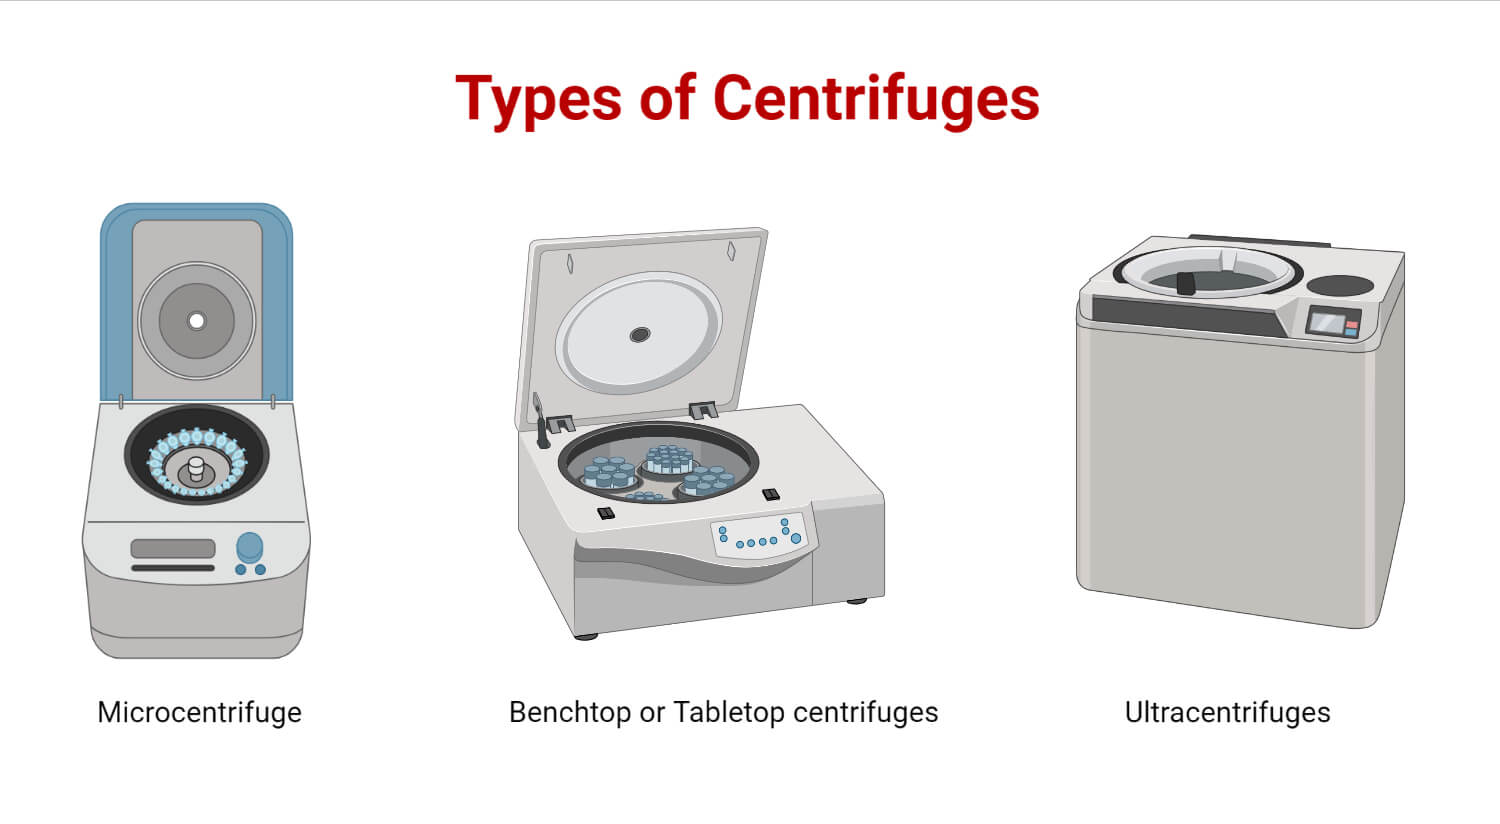 Figure 5: Microcentrifuge (left) and a larger benchtop centrifuge (center). (Image source: Replace with actual source/URL)
Key Parts:
- Rotor: Holds the sample tubes and spins.
- Lid: Must be securely closed during operation for safety.
- Controls: For setting speed (RPM or RCF) and time.
 Figure 5: Major parts in a centrifuge.
CRUCIAL - Balancing a Centrifuge:
- Equal Mass/Volume: Tubes placed opposite each other in the rotor MUST be of equal mass or volume.
- Symmetry: If you have an odd number of tubes, prepare a “balance tube” with water to match the mass/volume of your sample tube and place it opposite.
- Placement: Distribute tubes symmetrically around the rotor. For example, if using two tubes, place them directly opposite each other. If three, place them in a triangle pattern (if the rotor allows).
Improperly balanced centrifuges can vibrate violently, damage the instrument, and be a serious safety hazard!
Watch this video on how to balance a centrifuge:
Operating a Centrifuge:
- Load balanced tubes into the rotor.
- Securely close the lid.
- Set the desired speed (often in RPM - Revolutions Per Minute, or RCF - Relative Centrifugal Force) and time. RCF is a more standardized unit.
- Start the centrifuge.
- Do not open the lid until the rotor has come to a complete stop. Many centrifuges have a safety lock.
4. Measuring Acidity/Alkalinity: pH Meter
A pH meter measures the hydrogen ion (H⁺) activity in a solution, indicating its acidity or alkalinity on the pH scale (typically 0-14).
 Figure 7: A pH meter with its sensitive electrode. (Image source: Replace with actual source/URL)
Key Parts:
- pH Electrode: A glass electrode sensitive to H⁺ ions. This is fragile!
- Display: Shows the pH reading.
- Calibration Controls: Buttons or knobs for calibration.
Using a pH Meter (General Steps):
- Calibration: This is crucial for accurate readings.
- Calibrate the pH meter at the beginning of each use (or as instructed) using at least two standard buffer solutions of known pH (e.g., pH 4.00, 7.00, 10.00) that bracket your expected sample pH.
- Rinse the electrode with distilled water and gently blot dry before placing it in each buffer.
- Follow the instrument’s specific calibration procedure.
- Rinse Electrode: After calibration, rinse the electrode thoroughly with distilled water and blot dry.
- Measure Sample:
- Immerse the electrode tip in your sample solution. Ensure the bulb of the electrode is fully submerged.
- Allow the reading on the display to stabilize before recording the pH value. Gentle stirring of the sample may help.
- Rinse and Store: After use, rinse the electrode thoroughly with distilled water. Store the electrode according to manufacturer’s instructions, typically in a special storage solution (often KCl) to keep the glass bulb hydrated. Never store the electrode in distilled water for long periods.
Care of the pH Electrode:
- The glass bulb is very fragile. Do not bump it against the container.
- Always keep the electrode moist in its storage solution when not in use. A dry electrode will not function correctly and can be permanently damaged.
5. Temperature Control: Water Baths, Hot Plates & Stirrers
These instruments are used to control the temperature of samples or to mix solutions.
-
Water Bath: Provides a stable, controlled temperature environment for incubating samples in water. Ensure the water level is sufficient to cover the part of your sample vessels that needs to be heated/cooled.
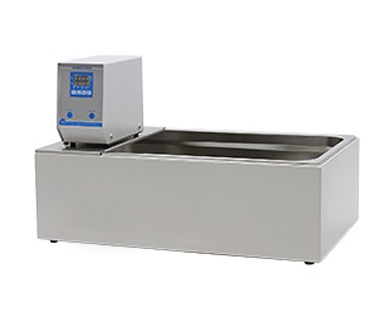 Figure 8: Water bath.
 -
Hot Plate: Used for heating solutions in glassware.
- Safety: Hot surfaces can cause burns! Use caution. Label hot glassware. Never leave a hot plate unattended when in use. Use only heat-resistant glassware (e.g., Pyrex or Kimax).
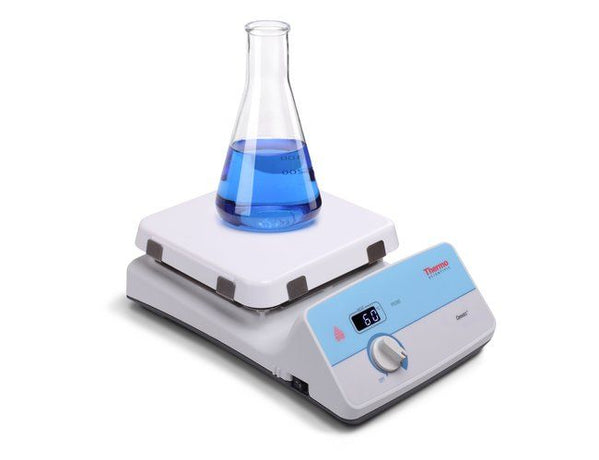 Figure 8: Hot plate.
- Safety: Hot surfaces can cause burns! Use caution. Label hot glassware. Never leave a hot plate unattended when in use. Use only heat-resistant glassware (e.g., Pyrex or Kimax).
-
Magnetic Stirrer (Stir Plate): Uses a rotating magnetic field to spin a magnetic stir bar placed inside a flask, thus stirring the solution. Often combined with a hot plate. Gradually increase stir speed to avoid splashing or the stir bar “jumping.”
 Figure 8: Magnetic stirrer.
Watch this video on how to use a magnetic stirrer:
6. The Vortex Mixer
A vortex mixer, or “vortexer,” is used to rapidly mix small volumes of liquids in tubes or vials.
6.1 Purpose and Principle
- Purpose: To resuspend pellets, mix reagents, or dissolve substances in a solvent.
- Principle: An electric motor with an offset drive shaft creates an eccentric motion in a rubber cup or platform. When a tube is pressed against the cup, this motion is transferred to the liquid, creating a vigorous vortex (whirlpool) that mixes the contents.
6.2 Key Components
- Motor Housing: Contains the electric motor.
- Cup Head/Platform: A rubber cup or a platform to hold one or more tubes.
- Speed Control Dial: To adjust the mixing speed.
- Power Switch: To turn the unit on/off.
- Mode Switch (on some models):
- Touch/Manual Mode: The vortexer operates only when a tube is pressed onto the cup.
- Continuous/Auto Mode: The vortexer runs continuously once switched on.

6.3 Important Considerations
- Hold tubes securely: Especially important at higher speeds to prevent the tube from flying off.
- Avoid over-vortexing: Some samples (e.g., proteins, genomic DNA) can be damaged by excessive or prolonged vortexing. Check your protocol.
- Lid Security: Double-check that tube lids are tightly closed. For open containers or loose caps, use very low speeds or alternative mixing methods.
Watch this video on how to use a Vortex Mixer:
Conclusion
Familiarity with lab instrumentation is key to your success and safety in the biology lab. Remember that each instrument is a precision tool requiring careful handling and operation. As you proceed through your lab courses, you will gain more hands-on experience with these and other specialized instruments. Always prioritize understanding how an instrument works and how to use it safely before you begin an experiment. Don’t be afraid to ask questions!
- Resources
- API
- Sponsorships
- Open Source
- Company
- xOperon.com
- Our team
- Careers
- 2025 xOperon.com
- Privacy Policy
- Terms of Use
- Report Issues